

GitHub is a for-profit company that offers a cloud-based Git repository hosting service. It also allows users/developers to store their project files for as long as possible.
Open-source software all have GitHub repositories for storing their files. GitHub is the base of contributing to open source.
Now, let's get started!

In this article, I will only be showing you how to host a basic website that encompasses only the front-end i.e website without a database connection or backend API.
CREATE A GITHUB ACCOUNT
If you already have a GitHub account, please skip this part
Navigate to GitHub, and click the signup button as shown in the diagram below

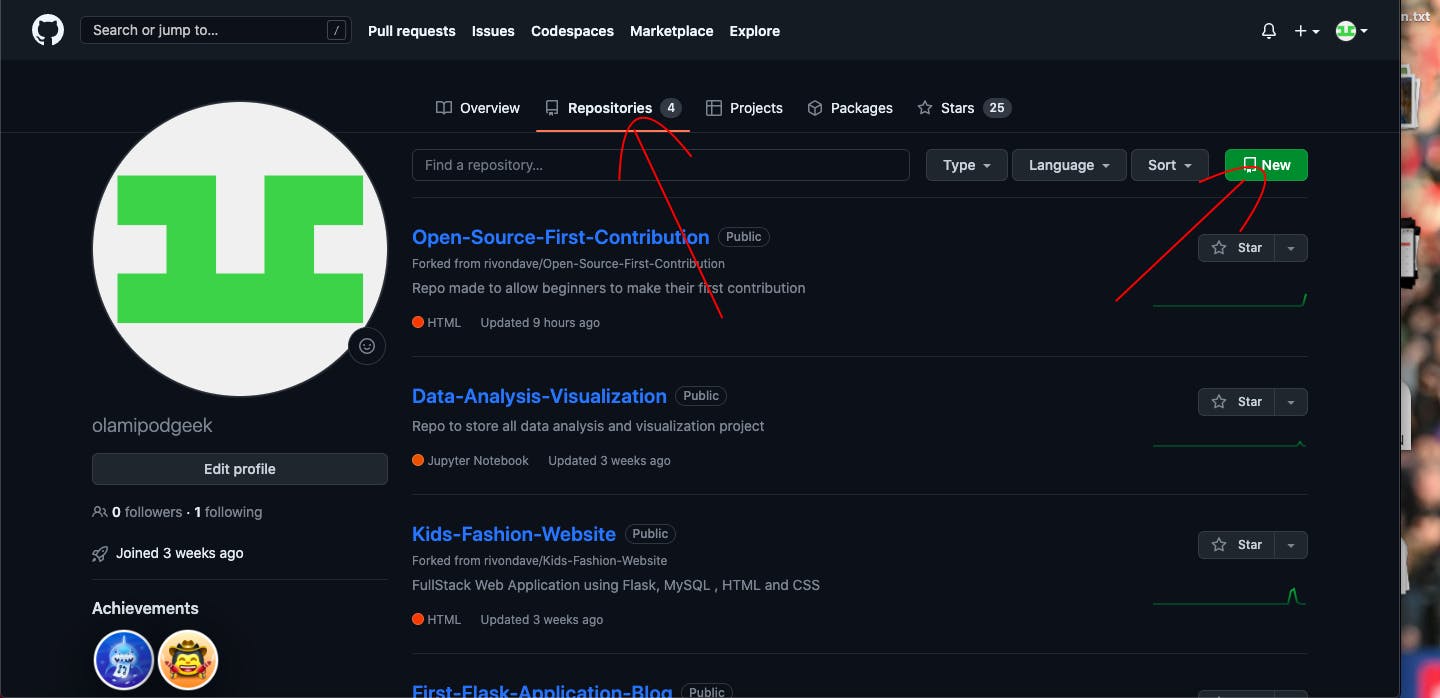
Follow the steps, and create an account and you should get somewhere here 👇
P.S The below image is not a new account but a sample GitHub account

CREATE GITHUB REPOSITORY
Although, since yours is a new account you would have zero repositories. Next, click on the repositories tab, then click on new See the below image for reference
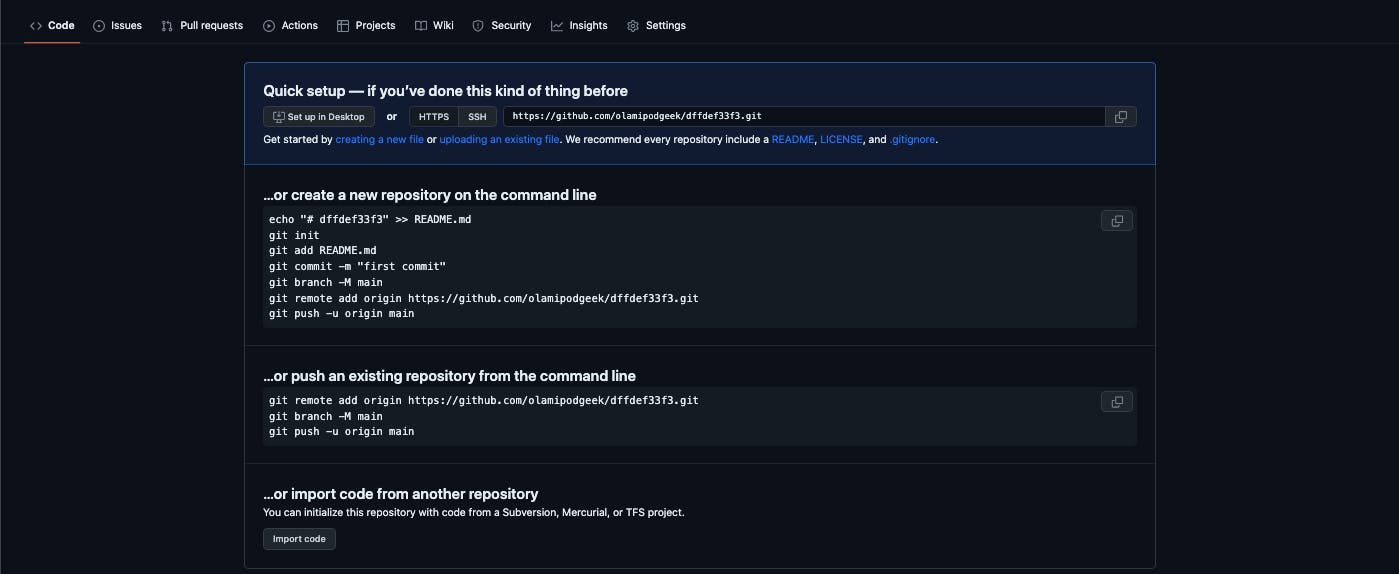
You should get here 👇

The first arrow shows where you enter your repo or project name
The second arrow shows where you enter the project description
The third arrow indicates if you want your project to be public (everyone can see it and be able to download it) OR private (only you can see it)
The fourth arrow shows if you wish to create a readme file, this readme file is what contains the project documentation
The fifth arrow shows the button you click to create this repo
After creating your repository, you should get here 👇
Congrats!, you have successfully created your repository.

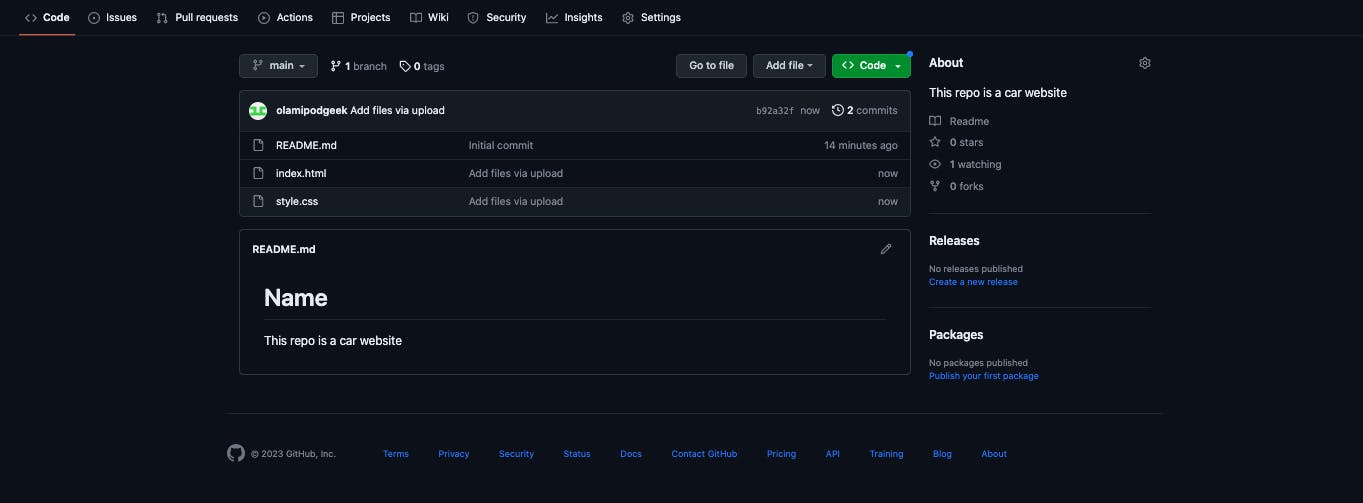
UPLOAD WEBSITE FILES TO THE REPOSITORY

The above image shows my website files index.html and style.css
To add files to your repo 👇

Click the upload existing files link as indicated above.
You are brought to this page👇

Click the Choose your files link indicated above.
It opens your directory, now, locate your files and click open. These files will begin uploading.
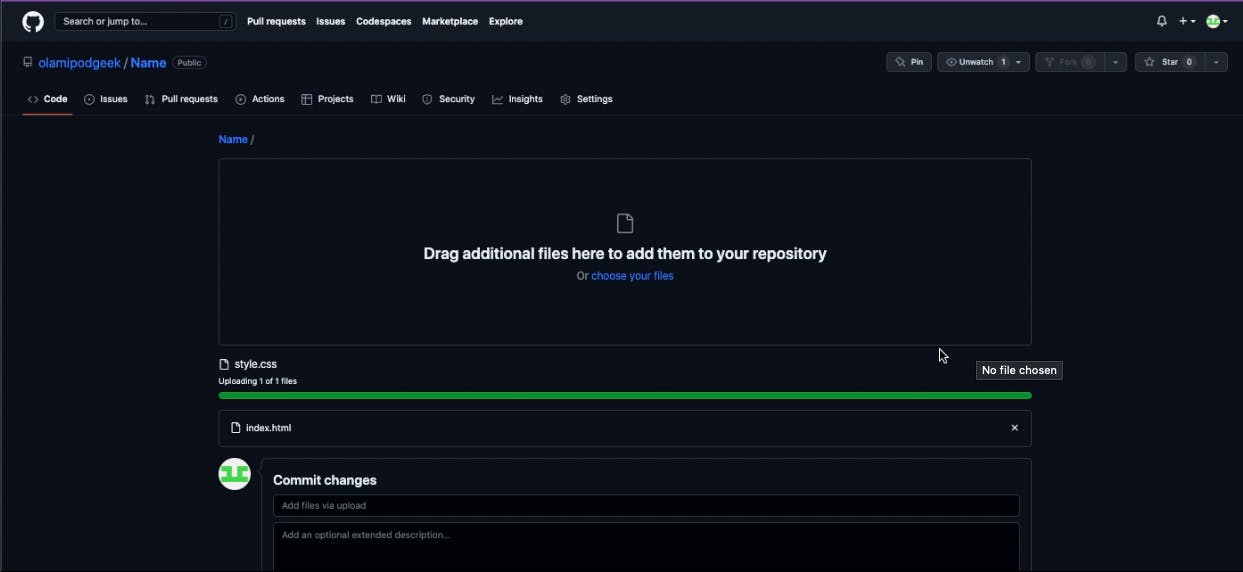
Now, that you can see the uploaded files, click commit changes.

You should see your repo like this 👇 with all your files.
HOST WEBSITE
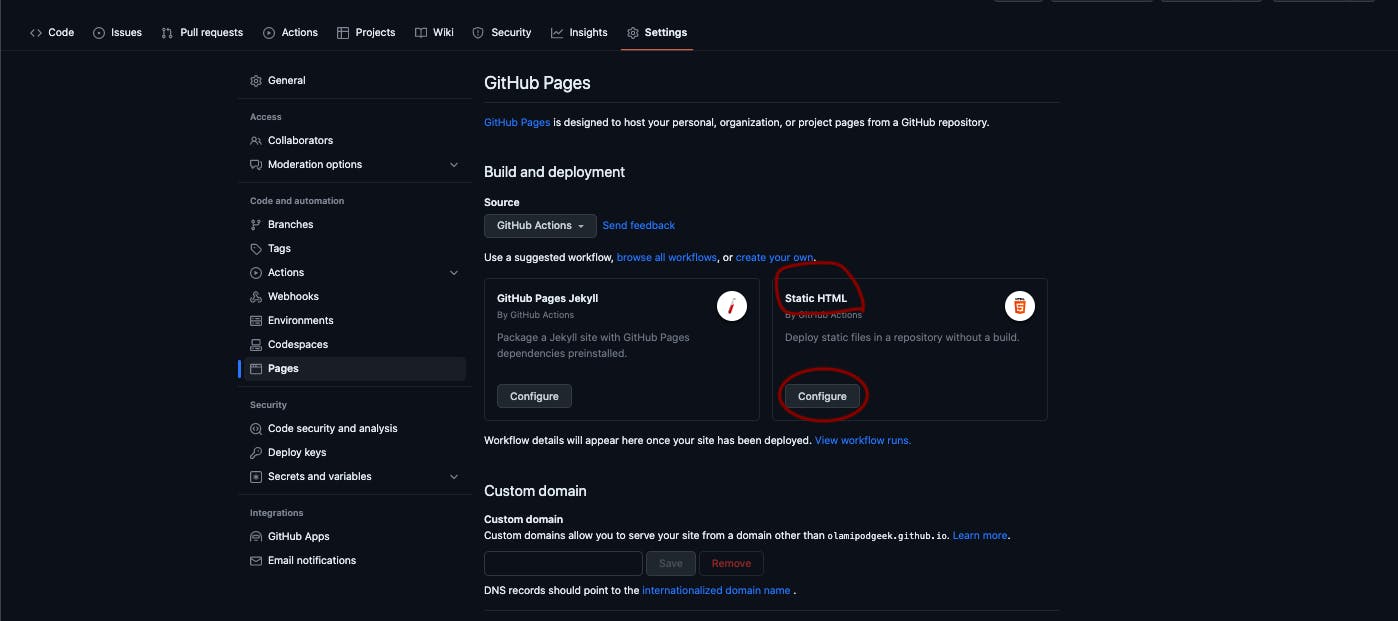
Navigate to the settings tab on your repo and click on pages as shown below 👇

On pages, click the drop-down button that says Deploy from a branch and select Github Actions

After following the above steps, the page automatically changes to this 👇, click configure under Static HTML as indicated below
It navigates to this page👇
Now, click Start commit, then click Commit new file as indicated below

Now, navigate back to the Code tab, and you will see the new directory created .github/workflows

Navigate to Settings -> Pages you should see the link to your hosted website.
N.B You must navigate to the code tab first before you navigate back to the settings tab before you can see the link.
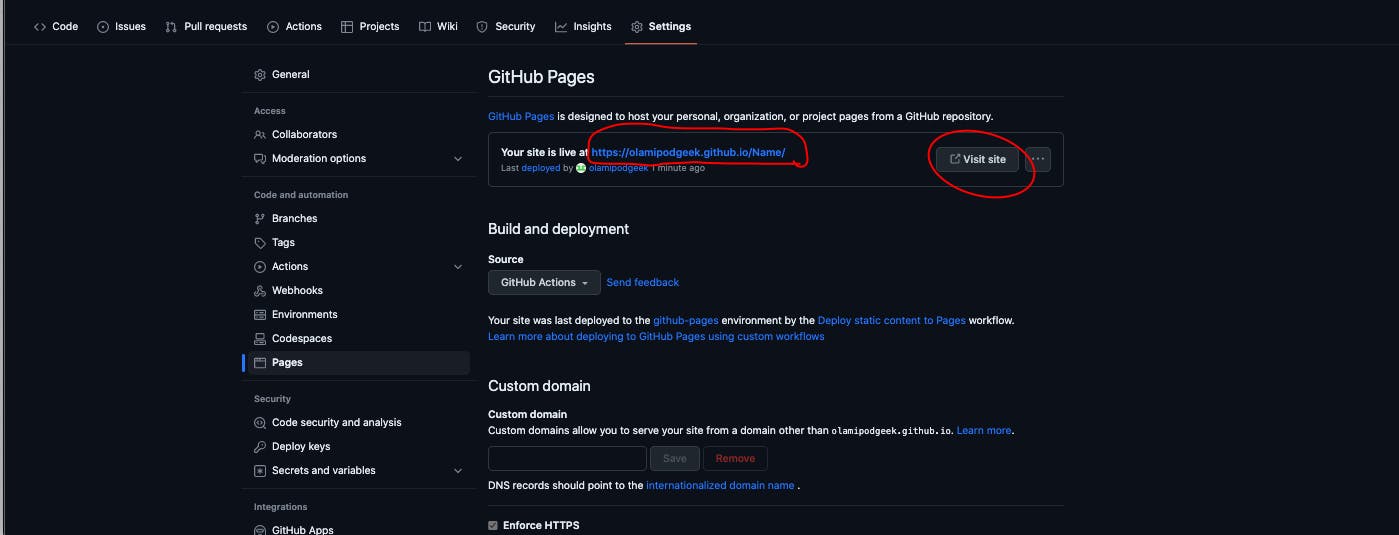
You can either copy and paste the link in your browser or just click visit site as indicated above.
Was this article helpful to you? Like, comment and follow for more articles like this 😎
Made with ❤️ from rivondave