

Table of contents
As a software developer, did you know contributing to open-source comes with massive benefits?
Just like every developer looking to contribute to open-source for the first time, I was lost. Strange commands here and there made me question if I could start contributing to open-source.
I used to think, one needs to be an expert to contribute to open source. Well no, even as a beginner in programming, contributing to open-source increases your experience in the specified field.
In this article, I am giving a step-by-step procedure on how I made my first contribution to an open-source project.
This article will also contain all errors and issues might be faced and how I overcame them.
Before that, let's do a brief intro to open source;
Open Source
What is Open Source?
Open source software (OSS) is software that is distributed with its source code, making it available for use, modification, and distribution with its original rights.
Simply see it as a project/software made public, to allow developers to modify, review and make changes/contributions to these projects.
Benefits Of Open Source Contribution
Allows developers to learn practically.
Helps to improve communication skills.
Learn to look from other developers' perspective
Allows developers to learn new skills, and always be up to date with the changes in software development
Builds confidence
Allows you to build your network by meeting new people
Teaches you how to understand and learn from feedback
Steps Taken
Steps that were taken to make my first pull request (contribute to open source)
When you make contributions to a project, these contributions or changes are not added directly to the original project.
The project owners/developers, review your contribution to see if it can be merged with the original project. This process is called creating a Pull Request (PR)
Find Repo: I found a repository on GitHub that I wanted to contribute to
"As a beginner, I contributed to the readme.md file also known as the project documentation file."
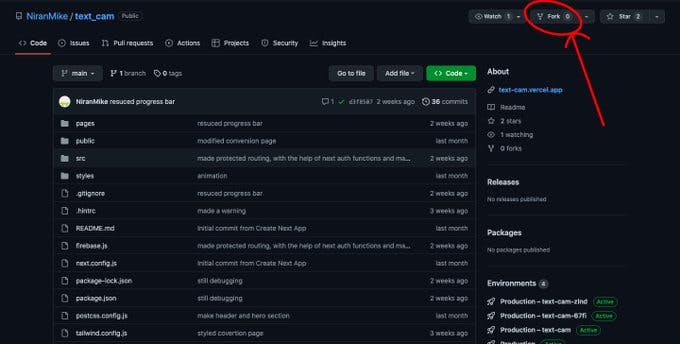
Fork Repo: I forked the repo.
The steps to fork a repo are as follows👇
Open the repository and click on the fork button at the top right corner
Next, click "Create fork"
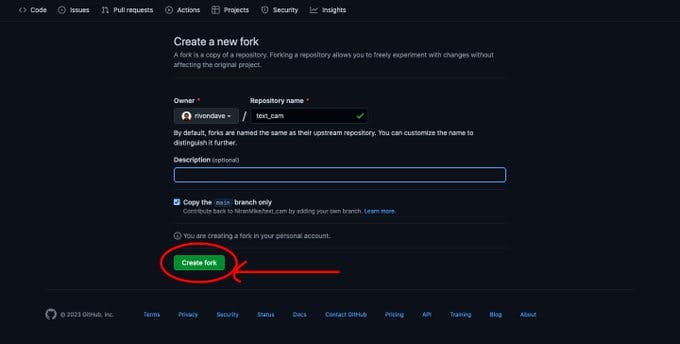
This repository will now be among your list of repositories
Clone Repo: I cloned the repository to my local system to allow me to make whatever contributions or changes I need to make
Steps to clone a repository👇
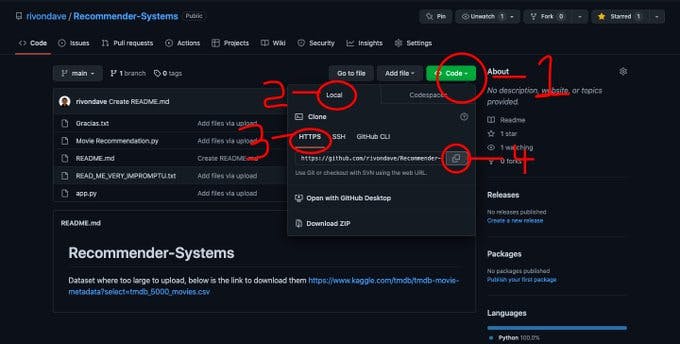
Click the code button as shown in the above diagram
Click local
Click HTTPS, you can also use SSH, and copy the link as shown in the diagram.
On my local system, I navigated to my Documents folder and opened it in the terminal (cmd).
Next, I executed the following command in my terminal git clone link copied
N.B The link copied should be the link you copied from GitHub earlier
The repository has now been successfully cloned to my computer, in my Documents folder
Make Changes: I opened this repository (now a folder) in my text editor (vs code) and made the changes I wanted to make.
Open Cloned Repo In Terminal: After making changes, I opened this repository folder in my terminal
Create A Branch: I created a new branch git checkout -b branch_name
Add Changes: Added my changes git add .
Commit Changes: Committed my changes git commit -m "I stated the contribution i made"
Push Changes: Push my changes up git push --set-upstream origin branch_name
NB you have to be connected to the internet when performing the git commands
Next, I went to my GitHub and opened the repo, upon opening, I saw this 👇

In the above image, readme2 is the branch_name.
Next, I clicked the COMPARE AND PULL REQUEST BUTTON.
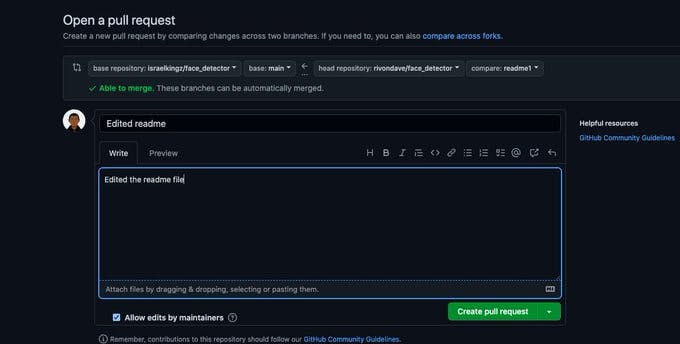
Next, I commented on the changes I made and clicked the CREATE PULL REQUEST button👇. Then it brought me here.
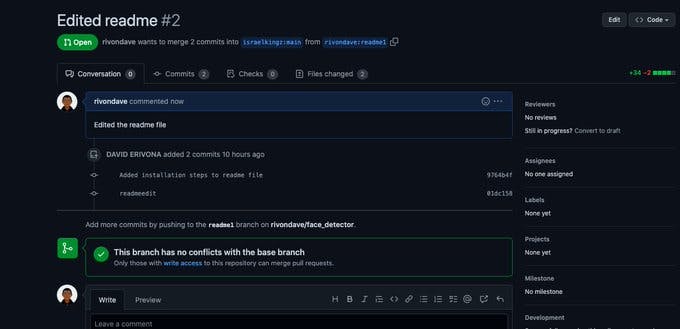
After this, I simply waited for approval from the owner of the project.
Congratulations 🤝 you have successfully contributed to open source.
Possible Errors
When I was running the last git command to push my changes up git push --set-upstream origin branch_name
I encountered the following error👇

This error is caused because GitHub no longer authenticates users using passwords again, instead, it uses a generated token
To generate a token, I did the following 👇
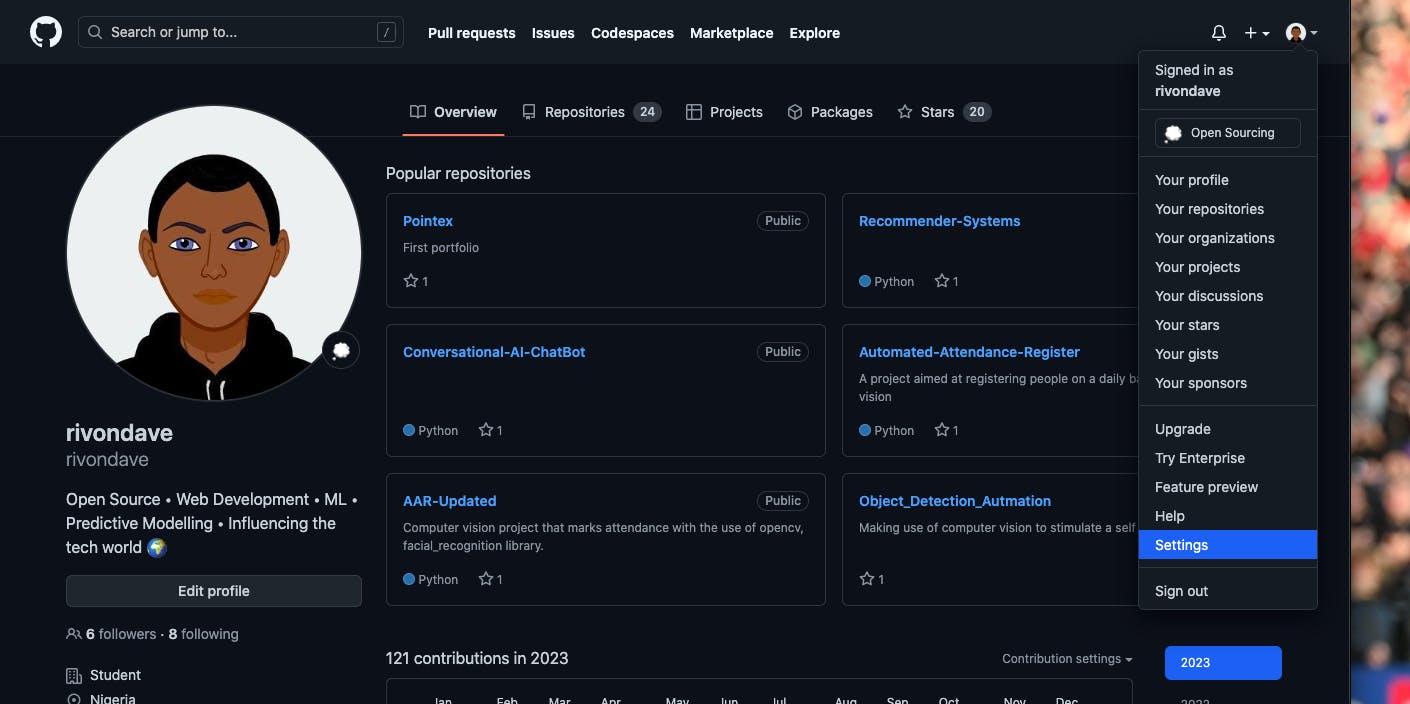
I went to my GitHub profile settings👇
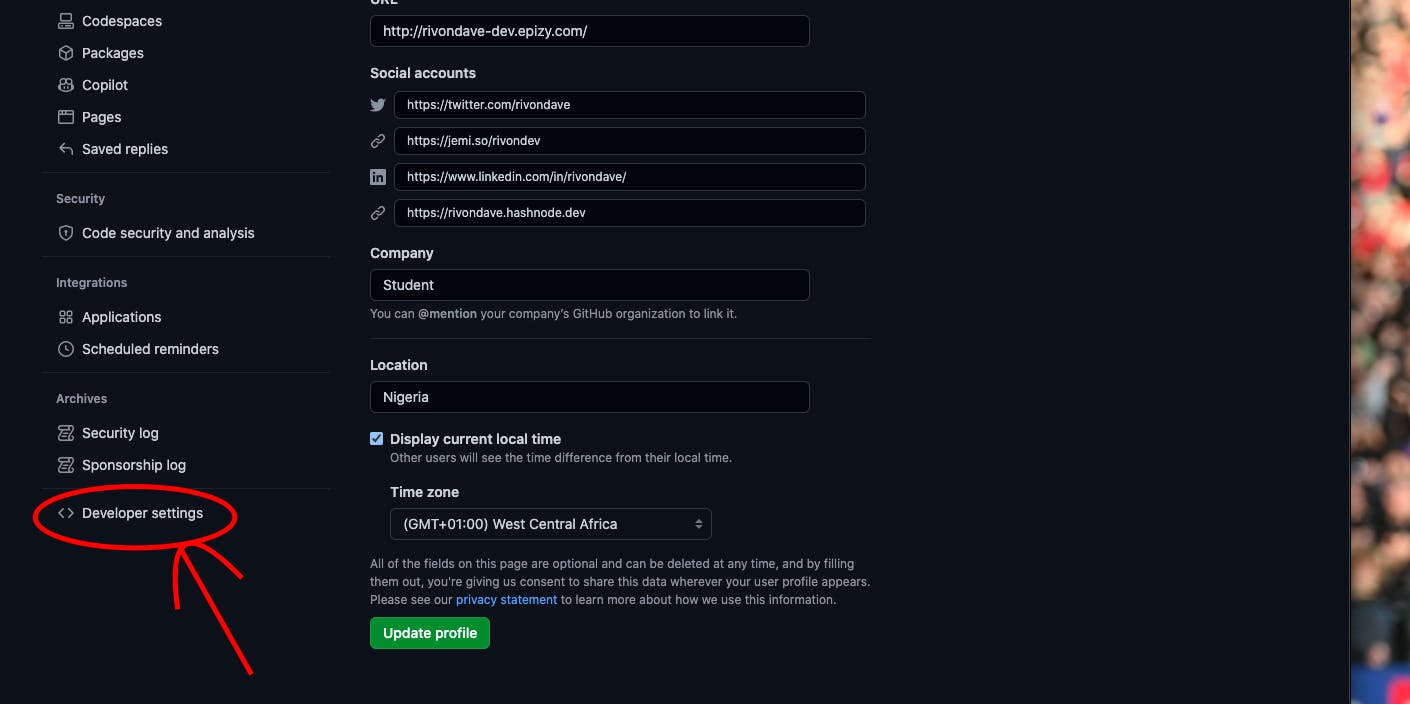
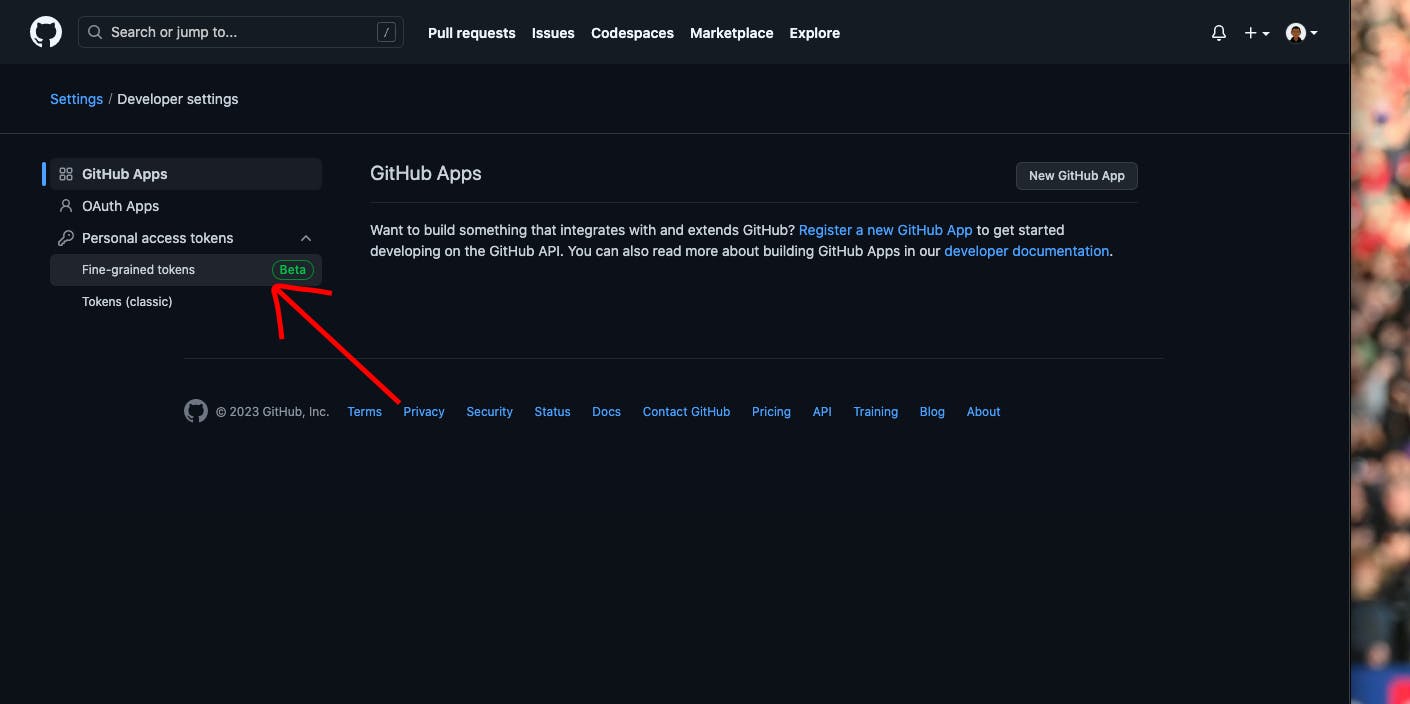
Scrolled down to developer settings and clicked it👇
Clicked on Personal access tokens, then clicked on Fine-grained tokens👇
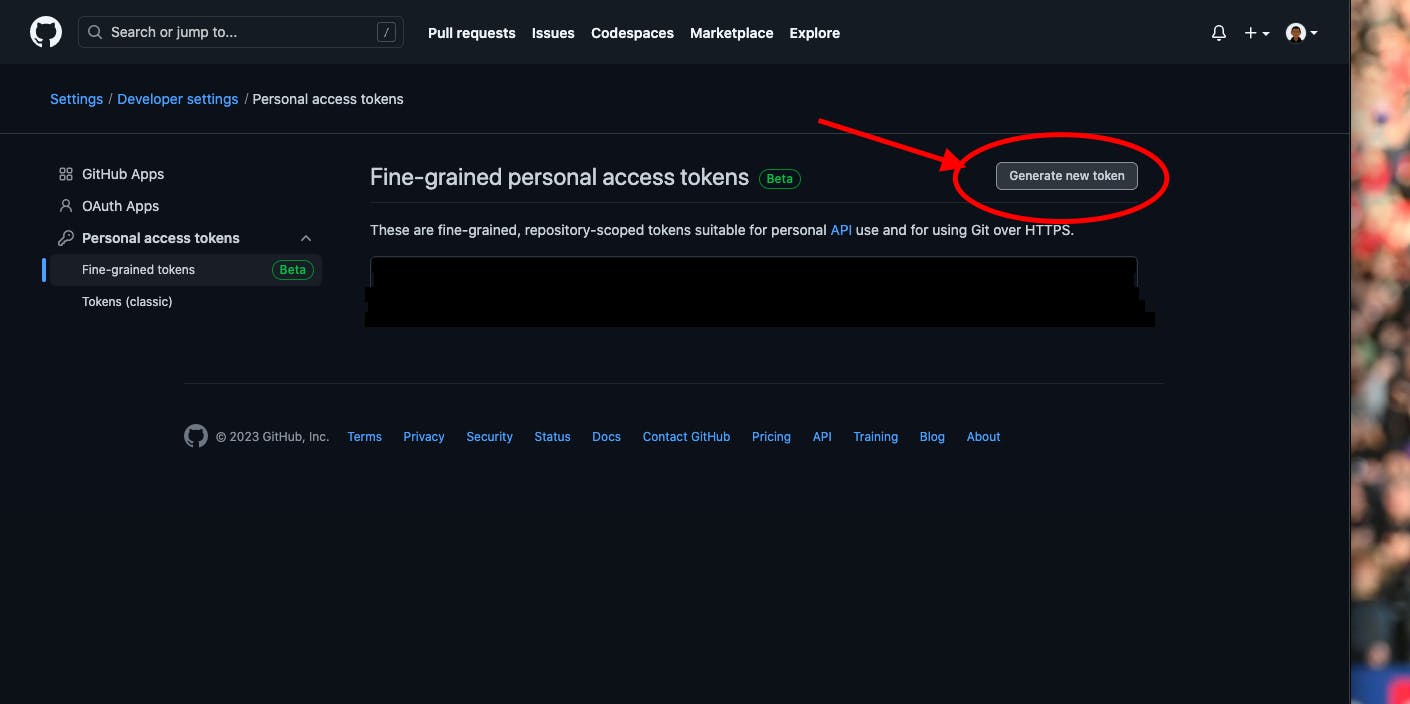
Next, I clicked on Generate new token👇
Then it brings a prompt for you to sign in. I signed in with my password 👇

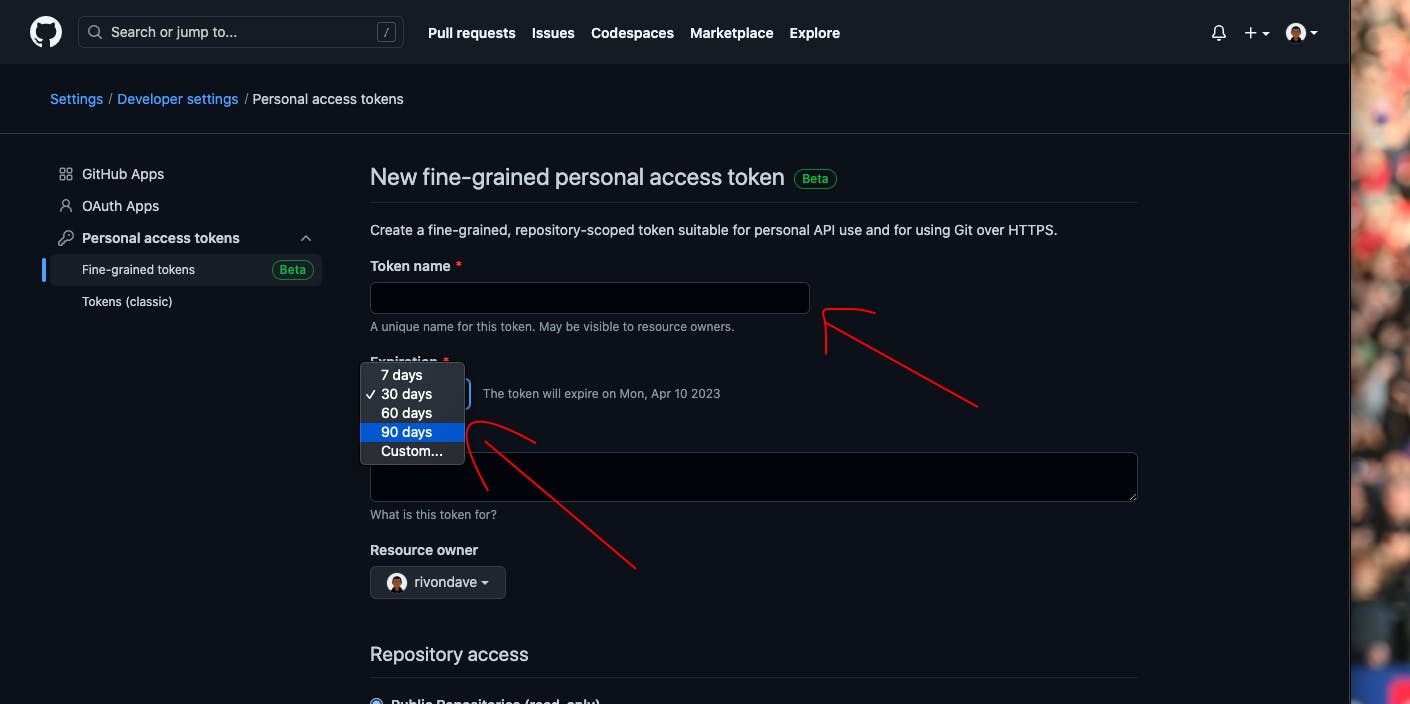
Next, it took me to this page👇, on this page, I entered the name for my token, and selected for it to last 90 days (you can click custom and set how long it should last)
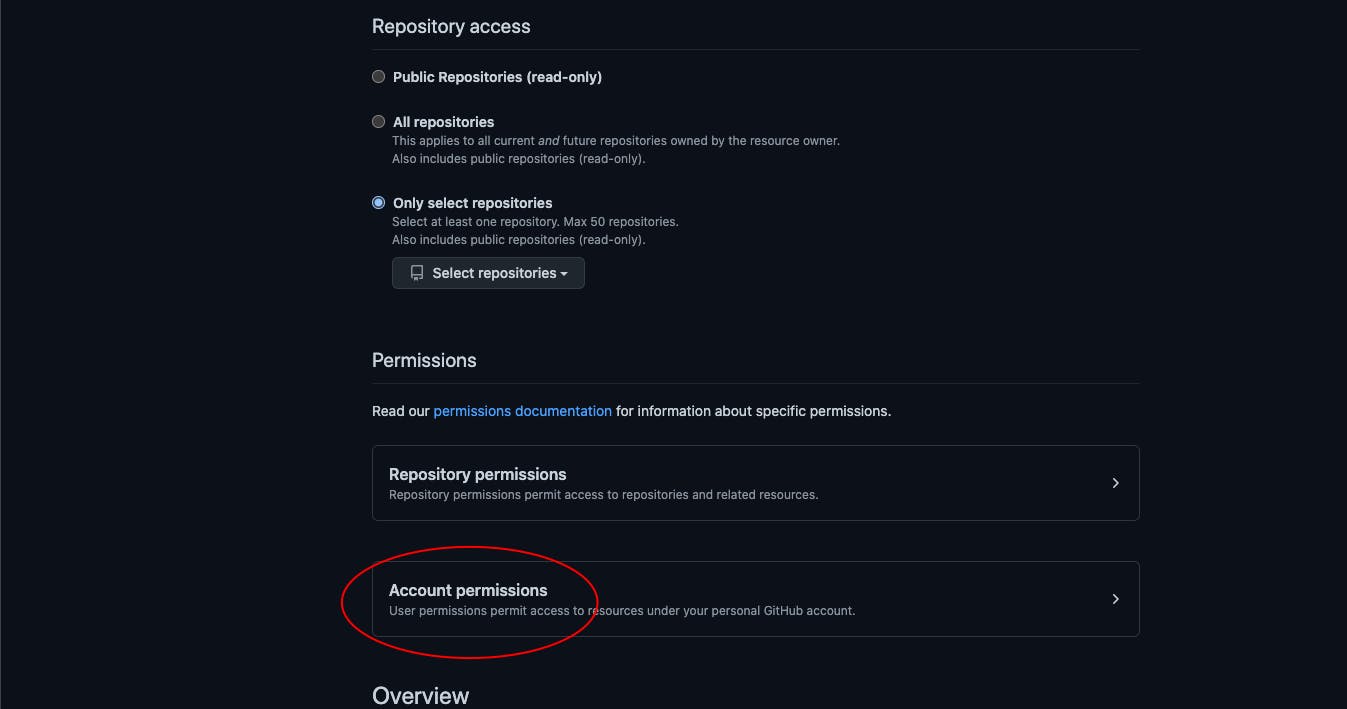
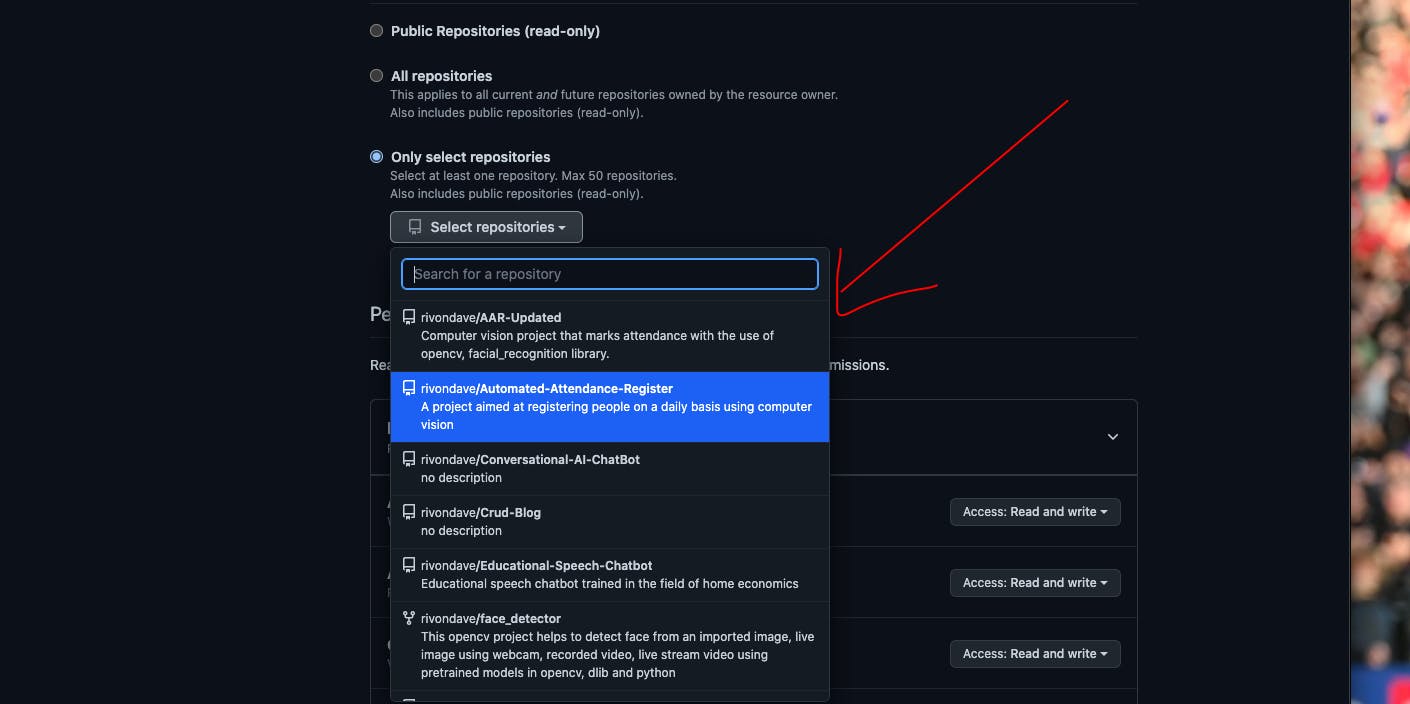
Next, I scrolled down 👇, and I selected the Only select repositories section this is such that the token can only access the repositories I want it to access.
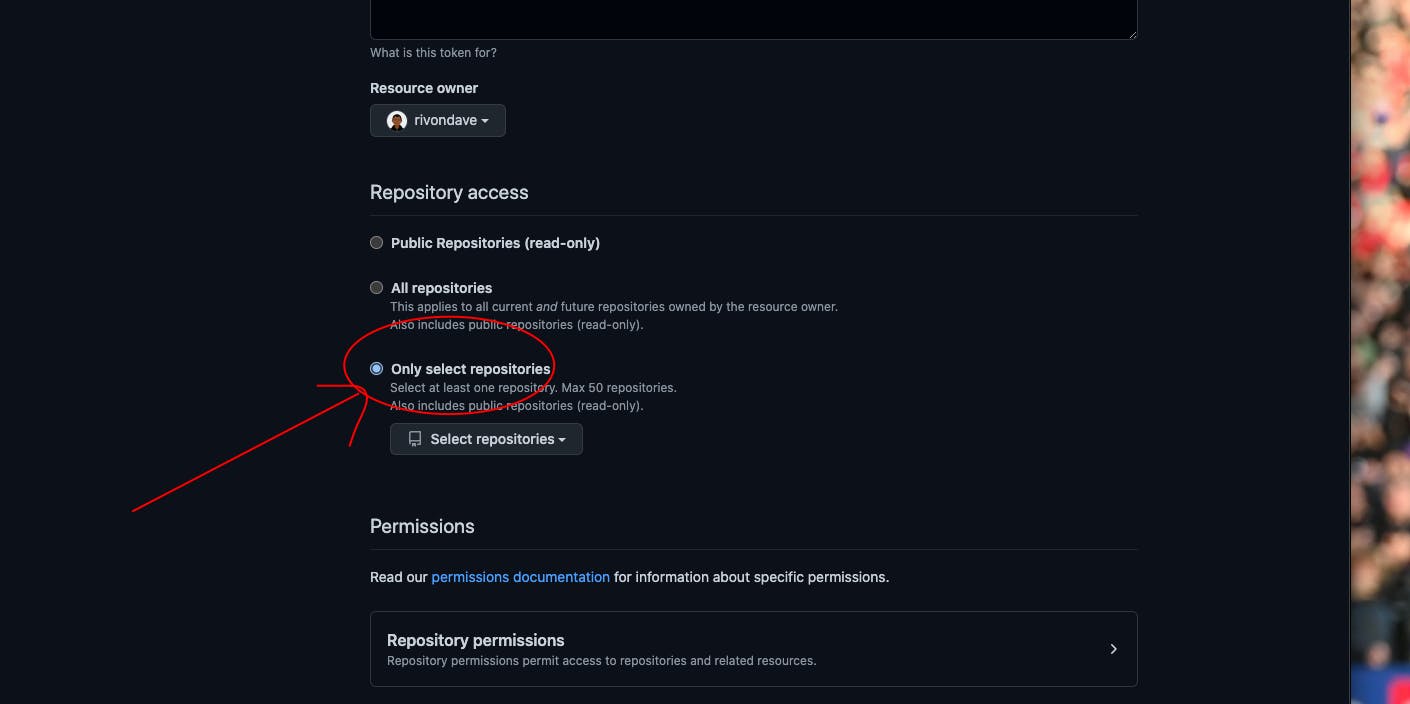
Now I selected the repository which I am working on from the list of repositories.
That is the repository I forked earlier on in this article.

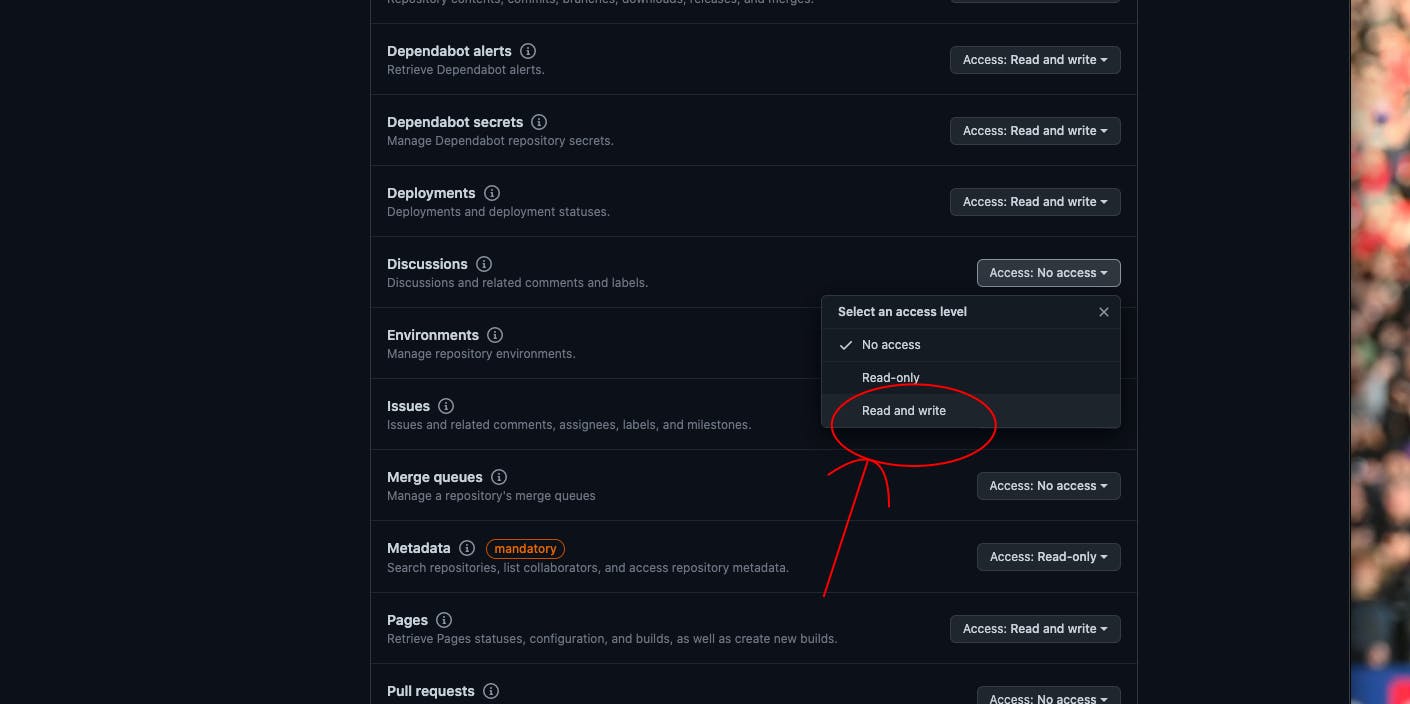
I allowed all permissions in the repository permissions👇

In cases where the options are No access, Read-only, Read and write. I selected Read and write
In cases where the options are No access, Read-only. I selected Read-only
I DID NOT ALLOW ACCESS TO THE ACCOUNTS PERMISSION PART
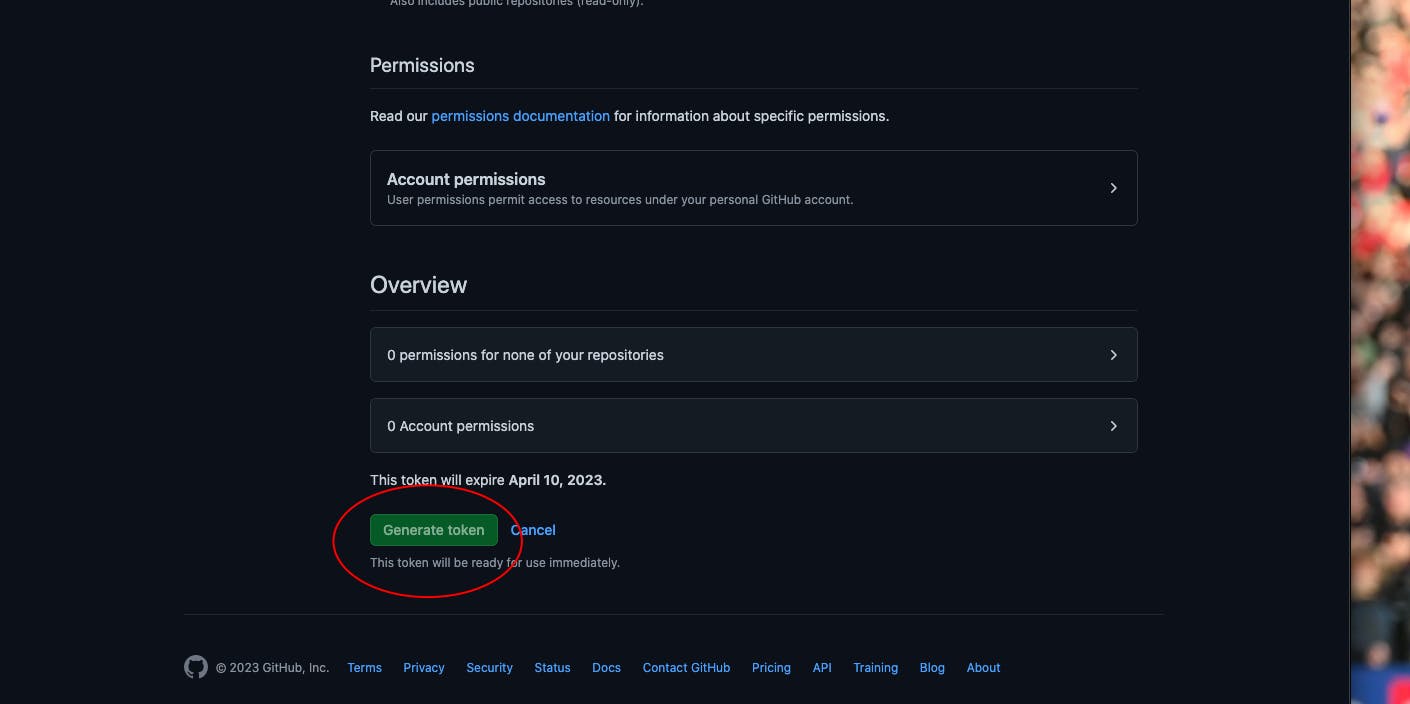
Next, click the Generate Token button
It brought me here, I simply clicked the name.
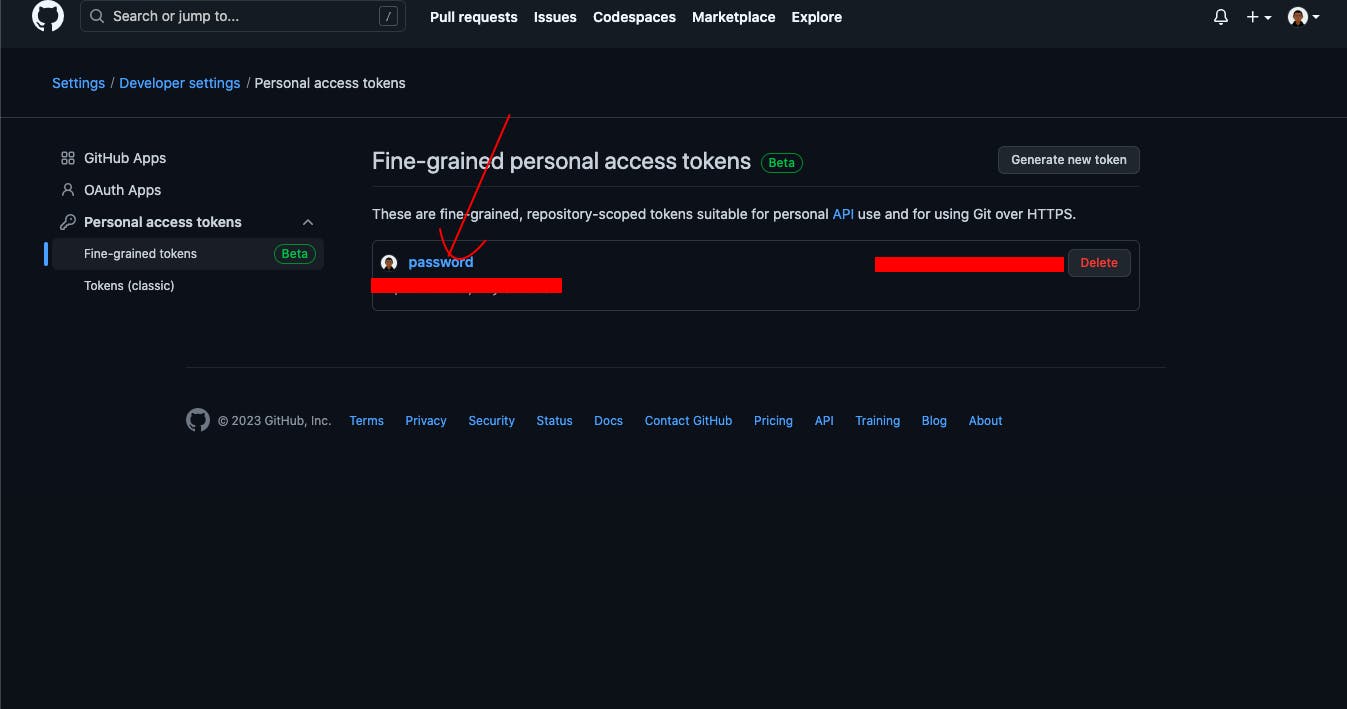
Upon opening, it shows your generated token, ensure to copy and paste this generated token immediately as you will not see it again. The token is usually a long string of characters consisting of letters and numbers starting with github_pat_.
NB: When trying to contribute to another open-source project, rather than generating a new token for each project, simply add the repository to the list as stated earlier, see the below image for reference👇
Did you enjoy this article? Ensure to like and follow for more.
Made with ❤️ from rivondave